
Cheesy Crunchy Delight: Mini Air Fryer Mac & Cheese Balls
When it comes to comfort food, few dishes can rival the creamy goodness of macaroni and cheese. The nostalgic combination of tender pasta enveloped in rich, melted cheese has captured the hearts—and stomachs—of food lovers for generations. Yet, as much as we relish the classic dish, there’s a new twist that elevates this beloved comfort food to an exciting appetizer: Mini Air Fryer Mac & Cheese Balls. These bite-sized treats are not only delicious but also embody a healthier approach to indulgence, thanks to the air fryer’s ability to achieve that perfect crunch with significantly less oil.
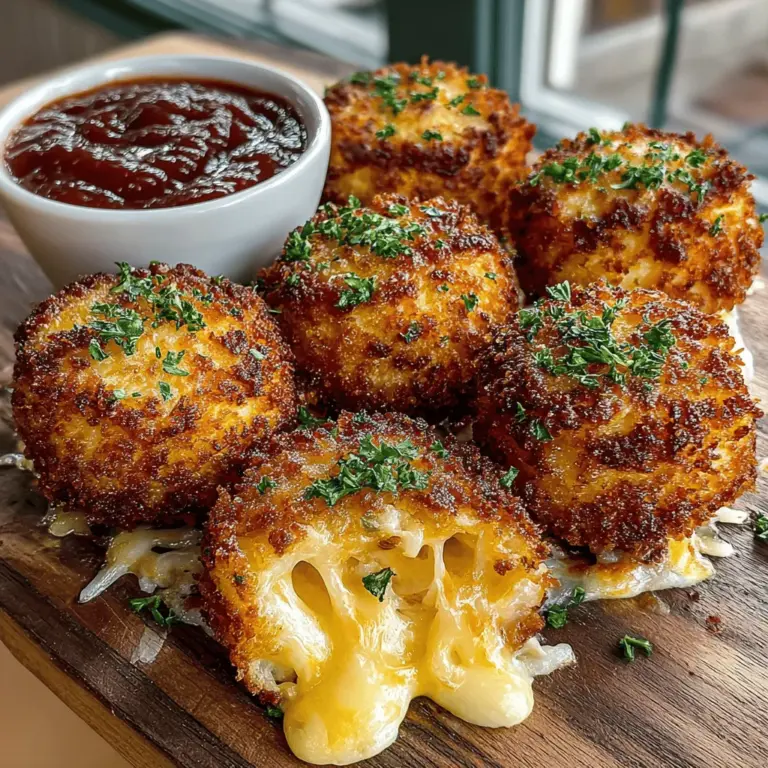
The allure of mac and cheese balls lies in their delightful combination of textures and flavors. The crispy exterior gives way to a gooey, cheesy interior, creating a satisfying contrast that makes every bite a pleasure. Whether you’re hosting a game day gathering, a casual get-together with friends, or simply looking for a fun snack to enjoy at home, these mini mac and cheese balls are sure to impress. Not to mention, they cater to various dietary preferences, making them suitable for vegetarians and adaptable for those with different tastes.
The Allure of Mac & Cheese Balls
Macaroni and cheese has long held a special place in culinary traditions across the globe, from the creamy Southern versions of the United States to the rich, baked variations found in Italian cuisine. The universal appeal of this dish is evident in its many interpretations, but the introduction of mac and cheese balls has sparked a culinary revolution. This innovative take has quickly gained popularity as a trendy appetizer, allowing food enthusiasts to enjoy the flavors of mac and cheese in a portable, snackable form.
The trend of mac and cheese balls extends beyond mere novelty; they embody the essence of comfort food while offering versatility in preparation and presentation. These delightful bites can be served as a starter at formal gatherings or enjoyed as a casual snack while binge-watching your favorite TV series. Furthermore, their adaptability means they can be customized with various ingredients to cater to different dietary needs, making them an inviting choice for a wide audience.
Ingredients Overview
To create the perfect mini mac and cheese balls, the selection and quality of ingredients are paramount. Each component plays a crucial role in crafting the ultimate flavor and texture experience:
– Cooked Macaroni: This forms the foundation of your dish. Opt for small pasta shapes, such as elbow macaroni, to ensure each ball holds its shape and provides the right bite.
– Sharp Cheddar Cheese: The star ingredient, sharp cheddar, adds richness and a robust flavor that is essential to the classic mac and cheese taste. The sharpness also balances well with other ingredients.
– Grated Parmesan Cheese: Enhancing both the texture and taste, grated Parmesan introduces a nutty flavor and promotes browning during the air frying process, resulting in a beautifully golden exterior.
– Egg: Serving as a binder, the egg is vital for holding the mac and cheese mixture together. It ensures that your balls maintain their shape during cooking and provides a creamy texture.
– Breadcrumbs (Panko): For that coveted crunch, panko breadcrumbs are the ideal choice. They are lighter and crispier than traditional breadcrumbs, giving your mac and cheese balls a delightful crunch when air-fried.
– Sour Cream: Adding a touch of creaminess, sour cream balances the richness of the cheeses while contributing to the overall texture of the mixture.
– Seasonings (Garlic Powder, Onion Powder, Smoked Paprika, Salt, Black Pepper): These seasonings elevate the flavor profile, infusing each bite with depth and warmth. The smoky notes from paprika add a unique twist that complements the cheeses beautifully.
Using high-quality ingredients will ensure that your mini mac and cheese balls are not only tasty but also memorable. Freshly grated cheese, for instance, melts better than pre-packaged varieties, leading to a creamier filling.
Step-by-Step Instructions
Now that we’ve covered the essentials of what makes these mac and cheese balls so irresistible, let’s dive into the preparation process. The first step is to create a rich and creamy mac and cheese base that will serve as the heart of our delicious bites.
Preparation of Mac & Cheese
Begin by cooking your macaroni according to the package instructions. You want it to be al dente, as it will continue to cook slightly when mixed with the cheese and when air-fried. Once the pasta is cooked, drain it and set it aside to cool slightly. This is an important step; if the pasta is too hot when combined with the cheese, it can lead to a clumpy mixture.
In a separate saucepan, melt a generous amount of sharp cheddar cheese with a splash of milk over low heat. Stir continuously until the cheese is completely melted and well combined. This step is crucial for achieving that luscious, creamy consistency that we associate with classic mac and cheese.
Once your cheese sauce is ready, it’s time to combine it with the cooked macaroni. Pour the melted cheese over the pasta and gently fold to ensure every piece of macaroni is coated in the cheesy goodness. This is where patience comes into play; take your time to mix thoroughly so that the cheese sauce envelops the pasta evenly. A well-coated mac and cheese base is essential for forming cohesive balls later on.
Incorporating the Egg
The next step is to add the egg to the mixture. Crack an egg into a small bowl and whisk it lightly before incorporating it into the macaroni and cheese. The egg is a key ingredient, acting as a binding agent that holds everything together. To ensure that the egg is evenly distributed, it’s best to mix it in thoroughly.
As you combine the egg with the mac and cheese, aim for a uniform consistency. This means that no dry clumps of cheese or pasta should remain, and the mixture should feel cohesive and slightly sticky. If the mixture feels too dry, you can add a tablespoon of sour cream or a splash of milk to help bind the ingredients together.
In the next part of our recipe journey, we will explore how to shape these delightful balls and prepare them for the air fryer, ensuring they achieve that perfect crunchy exterior while remaining gooey on the inside. Stay tuned for the exciting continuation of this cheesy adventure!
{{image_2}}
Chilling the Mixture
Chilling the mac and cheese mixture is an essential step in creating the perfect mini mac and cheese balls. When the mixture is chilled, it firms up, making it easier to handle and shape. This step not only enhances the texture of the final product but also helps maintain the integrity of the balls during cooking, preventing them from falling apart in the air fryer.
Benefits of Refrigerating the Mixture Before Forming Balls
Refrigerating the mixture offers several benefits:
– Easier Handling: A chilled mixture is less sticky and more manageable, allowing you to form uniform balls without the mixture sticking to your hands.
– Better Texture: Chilling helps the flavors meld together, resulting in a more cohesive taste experience with each bite.
– Reduced Cooking Time: When the mixture is cold, it requires less time in the air fryer, allowing for a quicker cooking process.
Suggested Chill Time and Its Impact on the Final Product
For optimal results, refrigerate the mac and cheese mixture for at least 30 minutes. This chilling time allows the cheese to set and the flavors to develop fully. If you have the time, chilling for up to an hour can further improve the texture, making them firmer and easier to shape.
Forming the Balls
Once the mixture has chilled, it’s time to shape the mac and cheese into balls that will become the stars of your dish.
Techniques for Rolling the Mixture into Balls
To form the balls, use the following techniques:
1. Scoop: Using a small cookie scoop or a tablespoon, scoop out a portion of the chilled mac and cheese mixture.
2. Roll: With clean, slightly damp hands, gently roll the mixture into a ball. The moisture from your hands will prevent the mixture from sticking, ensuring a smooth surface.
3. Size Matters: Aim for balls about 1 to 1.5 inches in diameter. This size ensures even cooking while also providing a satisfying bite.
Recommended Size for Even Cooking and Presentation
The ideal size for each ball is essential for achieving that perfect golden-brown exterior while keeping the inside creamy. Smaller balls may cook too quickly, leading to over-crisping, while larger ones may result in a soft interior that doesn’t heat through properly. Stick to the 1 to 1.5-inch range for the best results.
Coating Techniques
A key aspect of achieving that delicious crunch is the coating process. Here’s how to create a crispy exterior for your mac and cheese balls.
Step-by-Step Guide on Coating the Balls in Breadcrumbs
1. Prepare the Coating Station: Set up three shallow bowls: one with flour, one with beaten eggs, and one with breadcrumbs. You can use panko breadcrumbs for extra crunch.
2. Dredge in Flour: Roll each mac and cheese ball in flour, coating it evenly. This helps the egg adhere better.
3. Dip in Egg: Next, dip the floured ball into the beaten egg, ensuring it is fully coated. The egg acts as glue for the breadcrumbs.
4. Coat with Breadcrumbs: Finally, roll the egg-coated ball in the breadcrumbs. Ensure it is covered completely for that crispy finish.
Explanation of Double-Dipping for Extra Crunch
For an extra crunchy texture, consider double-dipping your mac and cheese balls. After the first round of coating, repeat the process by dipping back into the egg and rolling again in the breadcrumbs. This results in a thicker, crunchier crust that adds delightful texture to every bite.
Preheating the Air Fryer
Preheating the air fryer is a crucial step that shouldn’t be overlooked. This ensures that the mac and cheese balls cook evenly, resulting in a perfectly crispy exterior.
Importance of Preheating for Even Cooking
When your air fryer is preheated, it allows for consistent cooking temperatures, which is vital for achieving that golden-brown finish. Without preheating, the balls may end up unevenly cooked or soggy.
Suggested Temperature and Cooking Time for Optimal Results
Preheat your air fryer to 375°F (190°C). This temperature is ideal for cooking the mac and cheese balls to crispy perfection. Cook the balls for about 10-12 minutes, flipping them halfway through to ensure even browning.
Cooking in the Air Fryer
Now that your mac and cheese balls are coated and your air fryer is preheated, it’s time to cook!
Tips on Arranging the Mac and Cheese Balls in the Air Fryer
When placing the balls in the air fryer basket, arrange them in a single layer. Avoid overcrowding to ensure that hot air circulates around each ball, leading to even cooking and crispiness.
Importance of Spacing for Even Cooking and Crispiness
Leave some space between each ball; this allows the air fryer to work its magic by circulating hot air around the food. Proper spacing will lead to all-around crispiness, which is what you want for a delightful crunch.
Visual Cues for Determining When the Balls Are Done
Watch for visual cues to know when your mac and cheese balls are ready:
– Color: Look for a deep golden-brown color on the outside.
– Texture: The balls should feel firm to the touch.
– Temperature: If you have a food thermometer, the internal temperature should reach 165°F (74°C) to ensure they are heated through.
Serving Suggestions
These cheesy, crunchy delights are perfect for various occasions, and the right serving suggestions can elevate their appeal.
Ideas for Pairing with Dipping Sauces
Serve your mini air fryer mac and cheese balls with an array of dipping sauces to enhance their flavor:
– Marinara Sauce: A classic pairing that adds a touch of tanginess.
– Ranch Dressing: Creamy and herby, ranch offers a delicious contrast.
– Buffalo Sauce: For those who enjoy a spicy kick, buffalo sauce is an excellent choice.
Presentation Tips for Serving
Presentation is key when serving your mac and cheese balls. Here are some tips:
– Garnish: Sprinkle fresh herbs like parsley or chives on top for a pop of color and freshness.
– Cheese Topping: Add a sprinkle of extra cheese right before serving for an inviting, cheesy presentation.
– Serve Warm: These balls are best enjoyed warm and crispy, so serve them immediately after cooking for maximum enjoyment.
Nutritional Information and Serving Size
Understanding the nutritional benefits can help you appreciate these tasty treats even more.
Overview of the Nutritional Benefits of the Recipe
These mini mac and cheese balls are not just delicious; they can fit into a balanced diet with the right considerations. They provide a good source of carbohydrates for energy and protein from the cheese and egg, making them a satisfying snack or appetizer.
Suggested Serving Size and How This Recipe Can Fit into Various Meal Plans
A serving size of 3-4 mac and cheese balls is generally sufficient as a snack or appetizer. Depending on your meal plan, they can be part of a larger spread, such as a game day buffet or a cozy family dinner.
Conclusion
In conclusion, making mini air fryer mac and cheese balls is an enjoyable and straightforward process that results in a deliciously crispy and cheesy treat. The steps of chilling, forming, coating, and cooking are all integral to achieving the perfect balance of flavors and textures.
These delightful bites not only provide a nostalgic comfort food experience but also offer versatility in serving and pairing. Whether you’re enjoying them as a snack, appetizer, or part of a meal, they are sure to be a hit at any gathering.
We encourage you to try this recipe for yourself and share your experiences with friends and family. Revisit the joy of mac and cheese in a new, fun form that will bring smiles and satisfaction to everyone at the table.
