
Indulge in Irresistible Choco-Banana Bliss Pops: A Delightful Treat for All Ages
Introduction
If you’re looking for a dessert that combines fun, nutrition, and ease of preparation, look no further than Choco-Banana Bliss Pops. These delightful treats are designed to appeal to taste buds of all ages, making them an ideal choice for family gatherings, summer parties, or simply as a quick snack to satisfy a sweet craving. The magic lies in the simple pairing of ripe bananas and rich chocolate, creating a harmonious balance between nutrition and indulgence.
Choco-Banana Bliss Pops are not just a treat; they are a canvas for creativity, allowing you to experiment with toppings and presentations. The process of making these pops is straightforward, providing an engaging activity for kids and adults alike. Moreover, bananas are packed with health benefits, making this dessert a guilt-free pleasure. As we delve deeper into the recipe, you’ll discover the nutritional advantages of each ingredient and how they contribute to the overall experience of enjoying these blissful pops.
Understanding the Ingredients
To appreciate the Choco-Banana Bliss Pops fully, it’s essential to understand the roles of each ingredient and their individual health benefits. Here’s a closer look at what goes into this delectable treat.
– Ripe Bananas: The star ingredient, ripe bananas, are not just sweet and delicious; they are also incredibly nutritious. Packed with potassium, they help regulate blood pressure and support heart health. Additionally, bananas are a great source of dietary fiber, which aids digestion and keeps you feeling full. Their natural sweetness means you can enjoy a satisfying dessert without added sugars, making them an excellent base for our pops.
– Dark Chocolate Chips: The choice of dark chocolate elevates this dessert to another level. With a higher cocoa content than milk chocolate, dark chocolate is rich in antioxidants, which can promote heart health and improve mood. It also has a deep, complex flavor that beautifully complements the sweetness of bananas. Opting for dark chocolate not only enhances taste but also adds a healthy twist to your indulgence.
– Coconut Oil: This versatile ingredient plays a crucial role in creating a smooth and glossy chocolate coating. When melted, coconut oil helps the chocolate adhere to the bananas and provides a luscious mouthfeel. Health-wise, coconut oil contains medium-chain triglycerides (MCTs), which can boost energy levels and support metabolism. It’s a fantastic way to enhance the overall texture of the Choco-Banana Bliss Pops.
– Nuts: Adding a sprinkle of chopped nuts can enhance both the flavor and texture of your pops. Almonds, walnuts, or pecans are excellent choices, each bringing its own unique taste and health benefits to the table. Nuts are a great source of healthy fats, protein, and essential vitamins and minerals, making them a nutritious addition to this dessert. They also provide a satisfying crunch that contrasts beautifully with the creamy banana and smooth chocolate.
– Colorful Sprinkles: While optional, colorful sprinkles can add a fun and festive touch to your Choco-Banana Bliss Pops. They are especially appealing for children and can make any occasion feel special. Just be mindful of their sugar content and opt for natural versions when possible, ensuring that your treats remain as wholesome as they are enjoyable.
Step-by-Step Guide to Making Choco-Banana Bliss Pops
Now that you’re familiar with the ingredients and their benefits, let’s dive into the preparation process. Making Choco-Banana Bliss Pops is a straightforward and enjoyable activity that can be completed in just a few easy steps.
– Preparing the Bananas: The first step is selecting the right bananas. Look for ripe bananas with a few brown spots; they will be sweeter and easier to blend into the pops. To prepare them, peel the bananas and cut them into thick slices, approximately one inch in width. Alternatively, you can leave them whole if you prefer longer pops. Using a sharp knife, ensure clean cuts to prevent the bananas from bruising.
– Freezing the Banana Pops: Once your bananas are sliced, it’s time to freeze them. Place the banana slices on a parchment-lined baking sheet, ensuring they are spaced apart to prevent sticking. This step is crucial for achieving even freezing, which will help maintain the shape of the pops when dipped in chocolate. Freeze the bananas for at least 1-2 hours, or until they are solid. This will allow the chocolate coating to adhere better and will give you that satisfying frozen treat experience.
– Melting the Chocolate: While the bananas are freezing, you can prepare the chocolate coating. Place your dark chocolate chips and a tablespoon of coconut oil in a microwave-safe bowl. Heat the mixture in the microwave in 30-second intervals, stirring in between to prevent overheating. This method helps to avoid lumps and ensures a smooth melted chocolate. Alternatively, you can use a double boiler on the stovetop for a more controlled melting process. Once the chocolate is fully melted and glossy, you’re ready for the next step.
As you move forward, the excitement builds, and the anticipation of enjoying your homemade Choco-Banana Bliss Pops will only grow. Stay tuned for the next part of this article, where we’ll explore the final steps of coating the bananas and adding the finishing touches to this delightful treat.
{{image_2}}
Coating the Banana Pops
Once your banana pops are frozen solid, it’s time to dip them in chocolate. Start by melting your choice of chocolate in a microwave-safe bowl or using a double boiler method. If using a microwave, heat the chocolate in short intervals, stirring between each session until it’s completely smooth. This ensures that the chocolate does not burn and retains its glossy finish.
To coat the banana pops, remove them from the freezer and insert a popsicle stick into one end of each banana piece. Hold the stick and dip the banana into the melted chocolate, ensuring to cover the entire fruit. A good tip for achieving full coverage is to rotate the banana as you dip it, allowing the chocolate to flow around it. After dipping, gently shake the pop to let any excess chocolate drip off, preventing a messy finish.
If you notice that the chocolate begins to thicken as you work, simply return it to the microwave for a few seconds to reheat. This will keep your dipping process smooth and efficient. Once coated, place the chocolate-covered pops on a parchment-lined baking sheet, ensuring they do not touch each other to avoid sticking.
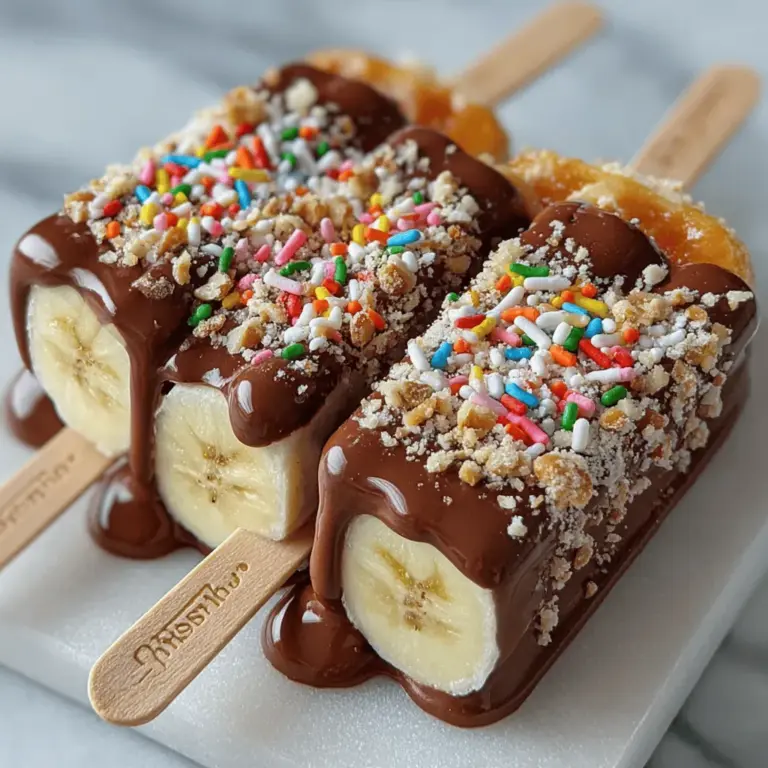
Adding Toppings
The fun doesn’t stop at chocolate! Elevate your Choco-Banana Bliss Pops by adding a variety of toppings. While traditional choices like chopped nuts and colorful sprinkles are always a hit, consider experimenting with more creative options. For a tropical twist, roll the chocolate-coated pops in shredded coconut. The contrast of textures adds an exciting element to each bite.
For a crunchy finish, try using granola or crushed cookies, such as Oreos or graham crackers. These not only enhance the flavor but also provide a delightful crunch. If you’re looking for a gourmet touch, drizzle some melted caramel or additional chocolate over the pops for a visually appealing finish. You can also sprinkle sea salt on top to create a sweet and salty flavor profile that is simply irresistible.
Finalizing the Pops
To ensure that your chocolate coating sets perfectly, it’s crucial to return the coated pops to the freezer for at least 30 minutes. This second freeze allows the chocolate to harden, creating a firm shell around the banana. The result? A delightful treat that’s as easy to eat as it is to make. Once the chocolate has set, your Choco-Banana Bliss Pops are ready for serving!
Serving Suggestions
When it comes to serving your Choco-Banana Bliss Pops, presentation is key. Arrange them on a decorative platter and consider pairing them with fresh fruit like strawberries or blueberries for a pop of color. You could also serve the pops with a small bowl of extra melted chocolate or caramel sauce for dipping, making the experience even more interactive and enjoyable.
For a fun twist, create a sundae bar where guests can customize their pops with various toppings. This is especially appealing for parties or family gatherings and encourages everyone to get creative.
Nutritional Information of Choco-Banana Bliss Pops
Understanding the nutritional content of your treats can help you enjoy them guilt-free. Each Choco-Banana Bliss Pop contains approximately:
– Calories: 150-200 (depending on chocolate and toppings used)
– Total Fat: 8-12g (mostly from chocolate)
– Saturated Fat: 5-7g
– Sugars: 12-15g (natural sugars from bananas and added sugars from chocolate)
– Protein: 1-2g
– Fiber: 2-3g
These pops can fit into a balanced diet. They provide a dose of potassium from bananas and antioxidants from dark chocolate, making them a healthier dessert option compared to many store-bought alternatives.
Creative Variations and Additions
One of the best aspects of the Choco-Banana Bliss Pops recipe is its versatility. Here are some creative variations you can try:
Flavor Variations
– Peanut Butter or Almond Butter: Before freezing the banana pieces, spread a thin layer of peanut butter or almond butter on them. This addition not only enhances the flavor but also adds protein and healthy fats.
Different Types of Chocolate
– White Chocolate or Flavored Chocolate: Switch things up by using white chocolate, which provides a sweeter taste and pairs wonderfully with the banana. You can also experiment with flavored chocolates, like mint or caramel-infused varieties, for a unique twist.
Alternative Coatings
– Shredded Coconut, Granola, or Crushed Cookies: Besides the classic toppings, consider using shredded coconut, granola, or crushed cookies like digestive biscuits or shortbread for a crunchy alternative that complements the creamy banana and rich chocolate.
Storage and Shelf Life
To keep your Choco-Banana Bliss Pops fresh, store them in an airtight container in the freezer. They can last for up to two months if properly stored, but you’re likely to enjoy them long before then! If you want to prevent the pops from sticking together, you can layer them with parchment paper in the container. Just make sure to allow them to thaw for a few minutes at room temperature before enjoying, as this helps soften the chocolate shell slightly for a perfect bite.
Conclusion
Making Choco-Banana Bliss Pops at home is a delightful and straightforward process that can be enjoyed by both adults and children. This recipe not only satisfies your sweet tooth but also encourages creativity in the kitchen. The simplicity of the preparation allows for a fun family activity, where everyone can customize their pops according to their taste preferences.
These homemade treats are a perfect blend of indulgence and nutrition, showcasing the natural sweetness of bananas paired with rich chocolate. Next time you’re looking for a fun dessert or a creative way to enjoy bananas, consider making these blissful pops. Embrace the joy of crafting your treats, and let your imagination run wild with flavors and toppings. Enjoy the satisfaction of sharing a homemade delicacy that everyone will love!
