
When it comes to summer desserts, few treats capture the essence of the season quite like peach bars. Their vibrant colors and sweet aroma evoke warm days spent outdoors, making them a perfect choice for picnics, barbecues, or even a quiet afternoon at home. Gooey Peach Bliss Bars take this beloved dessert to the next level, offering a delightful combination of flavors and textures that will leave your taste buds yearning for more. Each bite reveals a luscious peach filling enveloped in a buttery crust, topped with a perfectly crumbly layer that adds just the right amount of sweetness.
What makes these bars truly special is their gooey texture, which contrasts beautifully with the crunchy topping and the tender crust. This delightful combination makes them an irresistible choice for any gathering, whether you’re hosting a summer soiree or simply looking to treat yourself and your loved ones. The best part? This recipe is incredibly simple to follow, utilizing fresh ingredients to create a dessert that feels indulgent yet wholesome. Let’s delve into the wonderful world of Gooey Peach Bliss Bars and explore how you can make this scrumptious treat in your own kitchen.
Understanding the Ingredients
To create the perfect Gooey Peach Bliss Bars, it’s essential to understand the role each ingredient plays in the recipe. At the heart of this dessert are the fresh peaches, which provide not only flavor but also a natural sweetness that reduces the need for added sugars. When choosing peaches, look for ripe, juicy fruits that yield slightly to pressure. Fresh peaches not only enhance the taste but also pack a nutritional punch. They are rich in vitamins A and C, fiber, and antioxidants, making them a healthy addition to your snacks.
The crust of the bars is crafted from a blend of flour, oats, brown sugar, and melted butter. Each component contributes to the overall texture and flavor profile. The oats add heartiness and a delightful chewiness, while the brown sugar lends a deeper sweetness and a hint of molasses flavor. Using melted butter is crucial, as it creates a crumbly yet cohesive texture that holds the crust together perfectly.
The filling is where the magic truly happens. Along with the fresh peaches, the mixture includes sugar, cornstarch, and a touch of cinnamon or nutmeg. The sugar enhances the natural sweetness of the peaches, while the cornstarch acts as a thickening agent, ensuring that the filling maintains its gooey consistency without becoming too runny. The spices add warmth and depth, elevating the overall flavor profile of the bars.
Lastly, the crumble topping is a combination of oats, brown sugar, and butter, creating a delightful contrast to the soft filling and buttery crust. This topping not only adds a satisfying crunch but also enhances the dessert’s visual appeal with its golden-brown color.
Creating the Perfect Crust
Now that we’ve covered the ingredients, let’s dive into the initial steps of preparing the crust. The crust serves as the foundation for your Gooey Peach Bliss Bars, so it’s essential to get it just right. Start by preheating your oven to 350°F (175°C). This ensures that the crust bakes evenly and achieves that ideal golden-brown color.
In a mixing bowl, combine the flour, oats, brown sugar, and a pinch of salt. The salt is important as it enhances the flavor of the crust and balances the sweetness from the sugar. Next, pour in the melted butter. Using melted butter instead of softened or cold butter is key to achieving a crumbly texture. The warmth of the melted butter helps to bind the dry ingredients together while still allowing for a slight crumbliness that is characteristic of a great dessert crust.
Mix the ingredients until they are well combined; the mixture should resemble wet sand. If it feels too dry, you can add a splash of water or milk, but be cautious not to add too much, as you want the crust to maintain its crumbly texture. Once the crust mixture is ready, press it into the bottom of a greased baking pan, ensuring an even layer across the bottom.
Baking the crust is the next crucial step. Place it in the preheated oven and bake for about 15-20 minutes, or until it is lightly golden. Keep an eye on it to ensure it doesn’t overbake, as you want a firm base that will hold the filling without becoming too hard. Once baked, remove the crust from the oven and let it cool slightly while you prepare the peach filling.
Preparing the Peach Filling
The filling is arguably the most exciting part of creating Gooey Peach Bliss Bars. To ensure the best flavor, selecting the right peaches is essential. Look for peaches that are ripe but still firm; they should have a fragrant aroma and a slightly fuzzy skin. When you bite into them, they should be juicy but not overly soft. If you can’t find fresh peaches, you can use frozen ones, but be sure to thaw and drain them first to avoid excess moisture in the filling.
To prepare the filling, start by peeling and slicing the peaches. If you prefer a more rustic look, you can leave the skin on, but removing it will give the filling a smoother texture. Once sliced, place the peaches in a mixing bowl and sprinkle them with sugar, cornstarch, and your choice of spices. The sugar will help to enhance the sweetness of the peaches, while the cornstarch will thicken the juices released during baking. If you choose to add cinnamon or nutmeg, start with a small amount, as these spices can quickly overpower the delicate flavor of the peaches.
After combining the ingredients, let the mixture sit for about 10-15 minutes. This resting period allows the peaches to release their juices, creating a syrupy mixture that will result in an even more gooey filling. Stir the mixture gently to ensure that the sugar and cornstarch are well incorporated with the peaches.
Crafting the Crumble Topping
The final touch to your Gooey Peach Bliss Bars is the crumble topping. This component adds texture and visual appeal, making your bars not only delicious but also inviting. To craft the topping, you will again use oats, brown sugar, and butter. In a separate bowl, combine the oats and brown sugar, ensuring they are mixed well before adding melted butter.
The butter is crucial here as it binds the oats and sugar together while also providing richness and moisture. Similar to the crust, you want to achieve a crumbly consistency, so don’t over-mix. The key is to have a mixture that will hold together when pressed but still remains somewhat loose and crumbly when baked.
Once the crumble topping is ready, set it aside while you prepare to assemble the bars. By layering the gooey peach filling over the pre-baked crust and then sprinkling the crumble topping generously on top, you’ll create a dessert that boasts both flavor and texture.
As you embark on this baking adventure, remember that the magic of Gooey Peach Bliss Bars lies in the balance of flavors and the use of fresh, high-quality ingredients. With just a few simple steps, you will be well on your way to creating a dessert that is sure to impress family and friends alike. Stay tuned for the next part, where we will explore the final assembly and baking of these delightful bars.
{{image_2}}
Tips for Cutting Butter into Dry Ingredients for Perfect Consistency
Achieving the ideal consistency for your crust starts with how you cut the butter into the dry ingredients. Here are some tips to ensure a perfectly crumbly and flavorful base for your Gooey Peach Bliss Bars:
1. Use Cold Butter: Start with cold, unsalted butter. This helps create a flaky texture as the fat doesn’t melt too quickly when combined with the flour.
2. Cut into Small Pieces: Dice the butter into small cubes before adding it to the flour mixture. Smaller pieces will blend more easily into the dry ingredients.
3. Use a Pastry Cutter or Fork: Incorporate the butter by using a pastry cutter or a fork to cut the butter into the flour until the mixture resembles coarse crumbs. This method keeps the butter pieces intact, which is crucial for creating a flaky crust.
4. Don’t Overmix: Once the mixture reaches the desired crumbly texture, stop mixing. Overworking the dough can lead to tough bars instead of the tender, melt-in-your-mouth goodness we desire.
Assembling the Gooey Peach Bliss Bars
Assembling your Gooey Peach Bliss Bars is a delightful process that layers flavors and textures. Follow these step-by-step instructions to create a harmonious blend of crust, filling, and topping:
1. Prepare the Crust: Once you have your crumbly dough ready, press half of it into the bottom of a greased baking dish, creating an even layer. Use your fingers or the back of a measuring cup to ensure it’s compact and smooth.
2. Layer the Peach Filling: Take your prepared peach filling and spread it evenly over the crust. It’s essential to distribute the filling across the crust to ensure every bite is bursting with juicy peach flavor.
3. Add the Topping: Crumble the remaining dough over the peach filling. Aim for an even layer, allowing some filling to peek through. This not only adds texture but also creates a visually appealing contrast when baked.
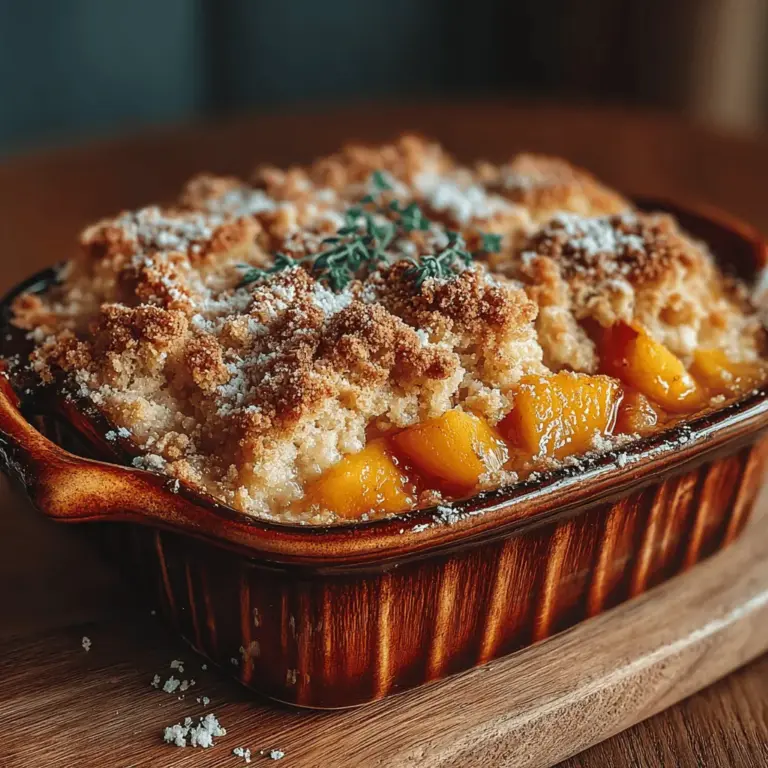
4. Visual Description: Imagine a baking dish filled with layers of golden crust, vibrant peach filling, and a crisp, crumbly topping. The colors contrast beautifully, enticing anyone who lays eyes on it.
5. Importance of Even Spreading: Ensuring even distribution of both the peach filling and the topping is crucial for balanced flavor. If one area has too much topping and another too little, the bars may not taste consistent throughout.
Baking: Timing and Temperature
Baking your Gooey Peach Bliss Bars correctly is key to achieving that coveted gooeyness and delightful texture. Here’s how to do it right:
1. Optimal Baking Temperature: Preheat your oven to 350°F (175°C). This temperature is ideal for baking the bars evenly, allowing the crust to become golden brown while the filling bubbles beautifully.
2. Timing: Bake the bars for approximately 30-35 minutes. Keep an eye on them towards the end of the baking time. The crust should be golden brown, and the filling should be bubbling around the edges.
3. Recognizing Doneness: Look for a golden topping and bubbling filling as indicators that your bars are done. The edges will begin to pull slightly away from the sides of the pan, which is another good sign.
4. Letting It Cool: Patience is key! Allow the bars to cool in the pan for at least 30 minutes, then transfer them to a wire rack to cool completely. This cooling period helps the filling set, making it easier to cut into perfect squares.
Serving Suggestions
Presenting your Gooey Peach Bliss Bars can elevate the experience, turning a simple treat into a showstopper. Here are some serving suggestions:
1. Presentation Techniques: Cut the bars into neat squares and arrange them on a decorative platter. Dust with powdered sugar for a touch of elegance. You can also garnish with fresh peach slices or mint leaves for a pop of color.
2. Accompaniments: These bars pair wonderfully with a scoop of vanilla ice cream or a drizzle of honey. The creaminess of the ice cream complements the sweetness of the peaches, while honey adds a natural floral note.
3. Occasions to Shine: Gooey Peach Bliss Bars are perfect for family gatherings, potlucks, or summer picnics. Their vibrant flavors make them an ideal dessert for BBQs or as a sweet treat after a hearty meal.
Storing and Enjoying Leftovers
If you happen to have leftover bars (though we doubt they will last long!), here’s how to store them properly:
1. Storing: Keep the bars in an airtight container at room temperature for up to 3 days. If you want to extend their freshness, refrigerate them for up to a week.
2. Freezing Options: For longer storage, these bars can be frozen. Cut them into squares, wrap each piece tightly in plastic wrap, and place them in a freezer-safe container. They can be frozen for up to 3 months.
3. Reheating Methods: When ready to enjoy, simply thaw the bars in the refrigerator overnight. To refresh them, you can warm them in the microwave for a few seconds or pop them in the oven at 350°F (175°C) for about 10 minutes.
4. Experiment with Variations: Don’t hesitate to get creative! Add nuts for a crunchy texture, sprinkle cinnamon for added warmth, or substitute different fruits like blueberries or cherries to tailor the recipe to your taste.
Conclusion
The journey of making Gooey Peach Bliss Bars is as delightful as the treat itself. Each step—from cutting the butter to layering the filling—brings you closer to a sweet, satisfying experience that is perfect for any occasion. These bars are not only a treat for your taste buds but also an opportunity to share joy with friends and family.
Their versatility makes them an excellent choice for summer picnics, holiday gatherings, or simply enjoying at home with a cup of tea. Embrace the process of baking, and let the sweet aroma of peaches fill your kitchen. Celebrate the joy of creating and sharing these delicious treats, and enjoy every gooey, blissful bite!
