Go Back
As the culinary world continues to evolve, the demand for healthier dessert options grows alongside it. The rise of plant-based diets and clean eating has led to an increased interest in recipes that cater to various dietary preferences while still satisfying our sweet tooth. One such delightful creation is the Frosty Oat Milk Dream Discs—an indulgent yet wholesome treat designed to bring joy without compromising health. These discs are not only delicious but also vegan and gluten-free, making them suitable for a wide audience.

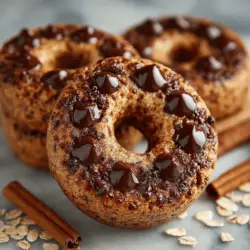
Frozen Yogurt Oat Milk Cookie Discs

Indulge in the refreshing taste of Frosty Oat Milk Dream Discs, a delightful dessert that caters to both your sweet tooth and health-conscious lifestyle. These vegan and gluten-free treats are made with wholesome ingredients like rolled oats, creamy oat milk, and dark chocolate chips, offering a luscious and satisfying experience. Perfect for any occasion, these discs are easy to prepare, allowing you to enjoy a guilt-free dessert that’s as tasty as it is nutritious. Try making your own today!

Ingredients
  

1 cup rolled oats

1 cup oat milk

1/2 cup almond flour

1/4 cup coconut sugar

1/4 cup pure maple syrup

1/4 cup coconut oil, melted

1 teaspoon vanilla extract

1 teaspoon baking powder

1/2 teaspoon ground cinnamon

1/4 teaspoon sea salt

1/2 cup dark chocolate chips (vegan, if preferred)

Instructions
 

Prepare Your Dry Ingredients: In a large mixing bowl, combine the rolled oats, almond flour, coconut sugar, baking powder, ground cinnamon, and sea salt. Stir well until all the dry ingredients are thoroughly mixed and evenly distributed.

    Mix the Wet Ingredients: In a separate bowl, whisk together the oat milk, melted coconut oil, pure maple syrup, and vanilla extract until the mixture is smooth and fully combined.

      Combine Wet and Dry Mixtures: Slowly pour the wet mixture into the bowl of dry ingredients. Stir gently until a sticky dough begins to form. If the dough appears too dry, add a splash of oat milk until the desired consistency is reached.

        Incorporate Chocolate Chips: Carefully fold the dark chocolate chips into the dough, ensuring they are evenly dispersed throughout the mixture.

          Shape the Discs: Line a baking sheet with parchment paper. Using your hands or a cookie scoop, portion out the dough and shape it into discs about 1/4 inch thick. Arrange them on the prepared baking sheet, leaving space between each disc to allow for slight expansion.

            Freeze the Discs: Place the baking sheet in the freezer and let the discs freeze for at least 2 hours or until they are firm to the touch.

              Store or Serve: After the discs have frozen, you can enjoy them immediately as a cool treat, or transfer them to an airtight container. They can be stored in the freezer for up to one month, making for an excellent refreshing snack on a warm day!

                Prep Time, Total Time, Servings: 15 minutes | 2 hours 15 minutes | 12 cookie discs

                  - Presentation Tips: Serve the frozen discs on a chilled plate, garnished with fresh mint leaves or a light dusting of additional cinnamon for an elegant touch. Enjoy your chilled delight!